UPDATE: the file names in this documentation have been changed. The server-side application is now referred to as VirtualServer.py, while the client-side script is called ProofOfScript.py. These names have been chosen to help readers easily follow along with the instructions. When running the API, please ensure you use the file names as indicated.
In order to run an application that interacts with your machines, you need to:
1. Build a virtual server
2. Run a script that operates accordingly with the server.
You need to Copy this repository code into the VS code terminal
If you haven’t done it already, Go ahead and Install the Dependencies:
pip install schedule
pip install flask
While not entirely necessary, you may want to upgrade to the latest pip version:
pip install –upgrade pip

Example result of pip install schedule below. In this instance the pip install schedule was already satisfied. However, a new release of pip may be available. While not entirely necessary, you may want to upgrade to the latest pip version:.

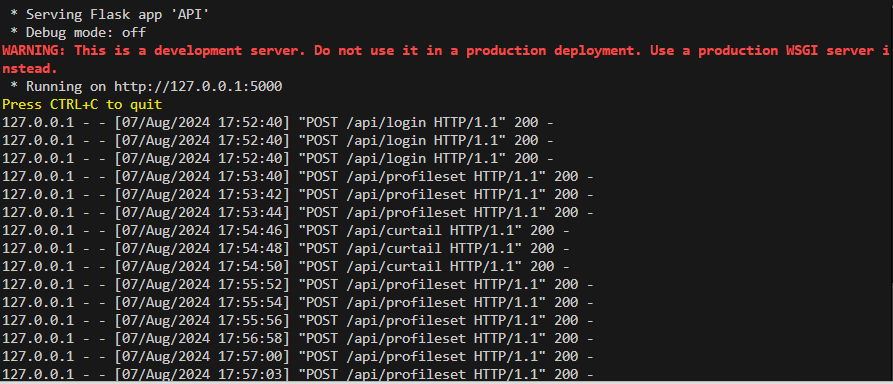
Run Flask API Server in the terminal
Type “VirtualServer.py”

Next, Run Miner Control Script (The “ProofOfScript.py” File)

Afterward, you can Monitor and Test Output
Remember, you need two separate terminals to run the Flask Server “VirtualServer.py” and the “ProofOfScript.py” Application
Flask Server (VirtualServer.py) Terminal: Logs API requests.
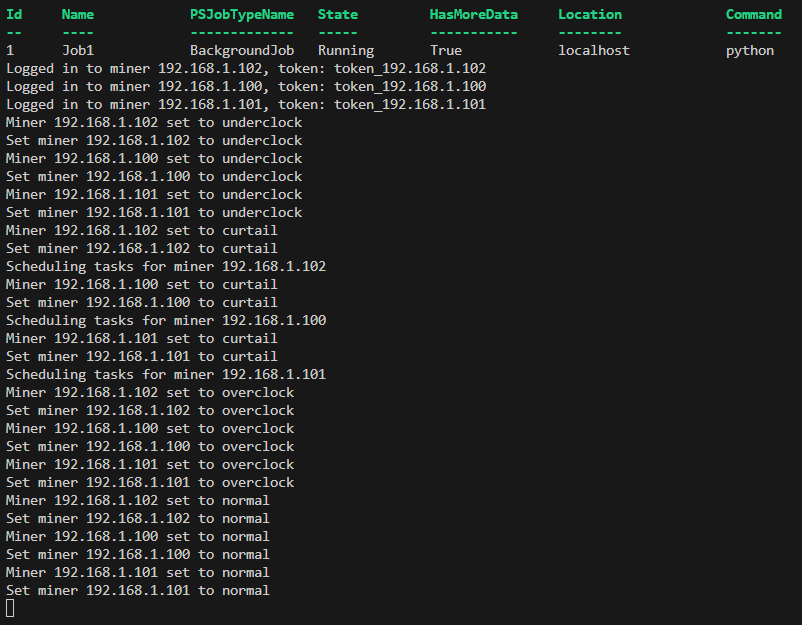
The Control Script (ProofOfScript.py) Terminal: Logs mode changes.
Use the import argparse to test your arguments within the script. This will allow you to adjust automation parameters and also will ensure the program works in real-time.

NOTE: There are at least 4 different ways to test the application to make sure it’s running.
Test the Login with curl (Command + Result shown below)

Test the Logout with curl (Command + Result shown below)
Test the Curtailment mode (“SleepMode”) with curl (Command + Result shown below)

Test the Overclock with curl (Command + Result shown below)

NOTE: Make sure you are LOGGED IN to the machine using the curl Command and have the proper IP address, or your Overclock, Normal, Underclock, and Curtail tests will result in an error.(Pictured below)

TEST Server/Machine interaction IN REAL-TIME
To test all automated power controls(Overclock, Normal, Underclock, and Curtail) in real-time,
simply schedule the controls 1 minute apart during that time of day. In this example the automated control test started at 5:53 P.M. or 17:53 Military time
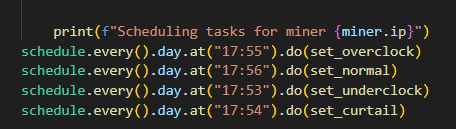
The different commands will be listed in real time based off of the time you set in the script

BitcoinVersus.Tech Editor’s Note:
We volunteer daily to ensure the credibility of the information on this platform is Verifiably True. If you would like to support to help further secure the integrity of our research initiatives, please donate here
BitcoinVersus.tech is not a financial advisor. This media platform reports on financial subjects purely for informational purposes.

Leave a comment