Setting up an Ubuntu Virtual Machine (VM) using Oracle VirtualBox begins with downloading the latest ISO file from Ubuntu’s official site.
For Ubuntu 24.04, users typically select the desktop version compatible with their hardware architecture, commonly “amd64.”
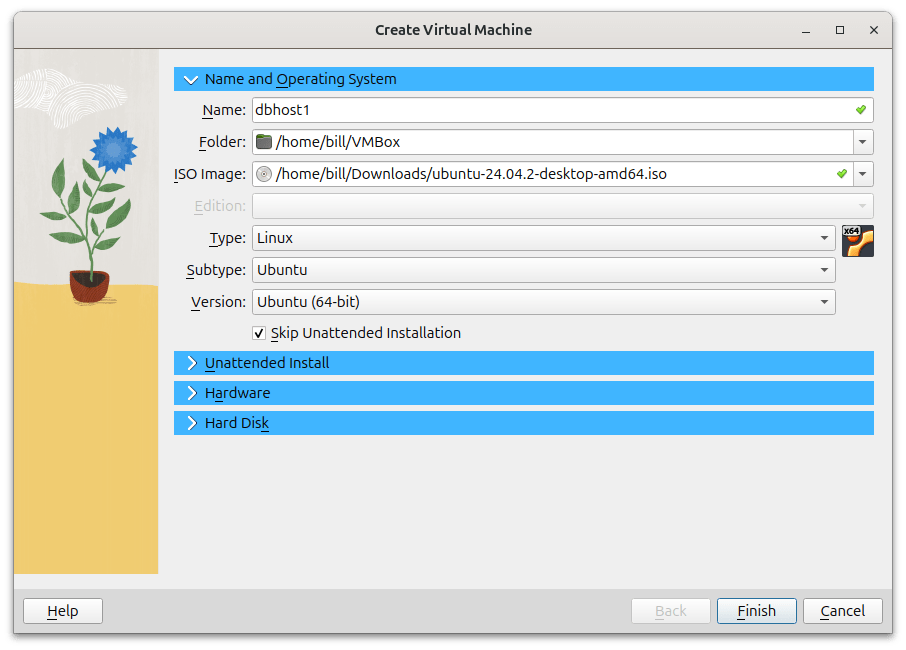
After downloading, users open Oracle VirtualBox, create a new VM, name it, select the Linux operating system type, and choose “Ubuntu (64-bit)” as the specific version.
Commands Used During Installation
Once the graphical installation is complete, users often execute sudo apt update and sudo apt upgrade to keep the VM current. Troubleshooting commands such as dmesg to review kernel logs and inspection of the system logs at /var/log/syslog are frequently used to address any installation or boot errors.
Detailed VM Configuration Steps
After initiating the VM creation, opt to bypass “Unattended Install” to manually customize the installation.
Key configurations involve assigning sufficient RAM, allocating adequate storage space, and critically, setting the graphics controller to “VMSVGA” within VirtualBox’s display settings.
This particular setting improves compatibility with Ubuntu’s graphics infrastructure, effectively addressing common graphical boot issues.
Fixing Common Graphical Boot Issues
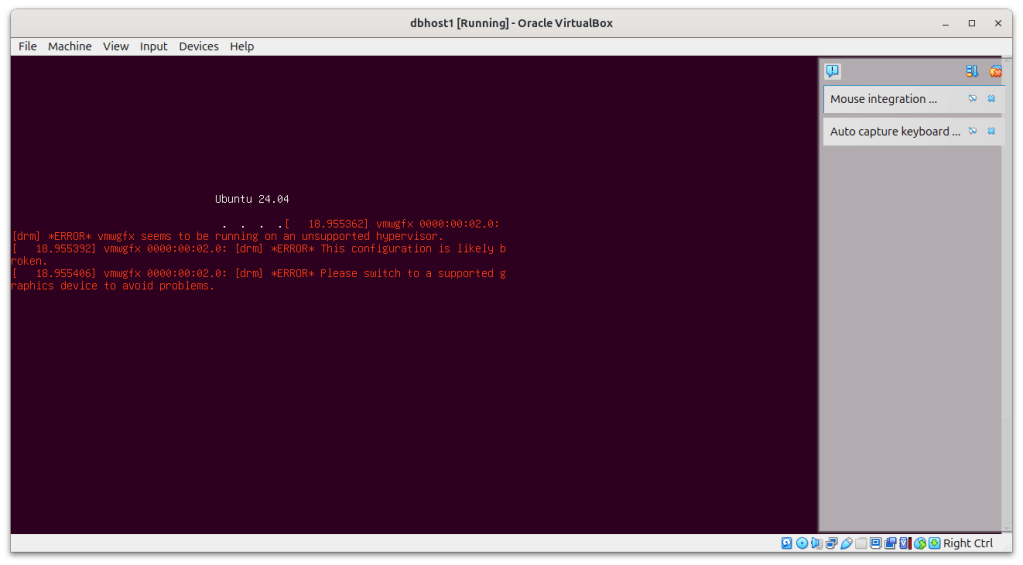
Initially, despite correctly configuring the graphics controller and other VM settings, your VM continued showing the vmwgfx unsupported hypervisor error.
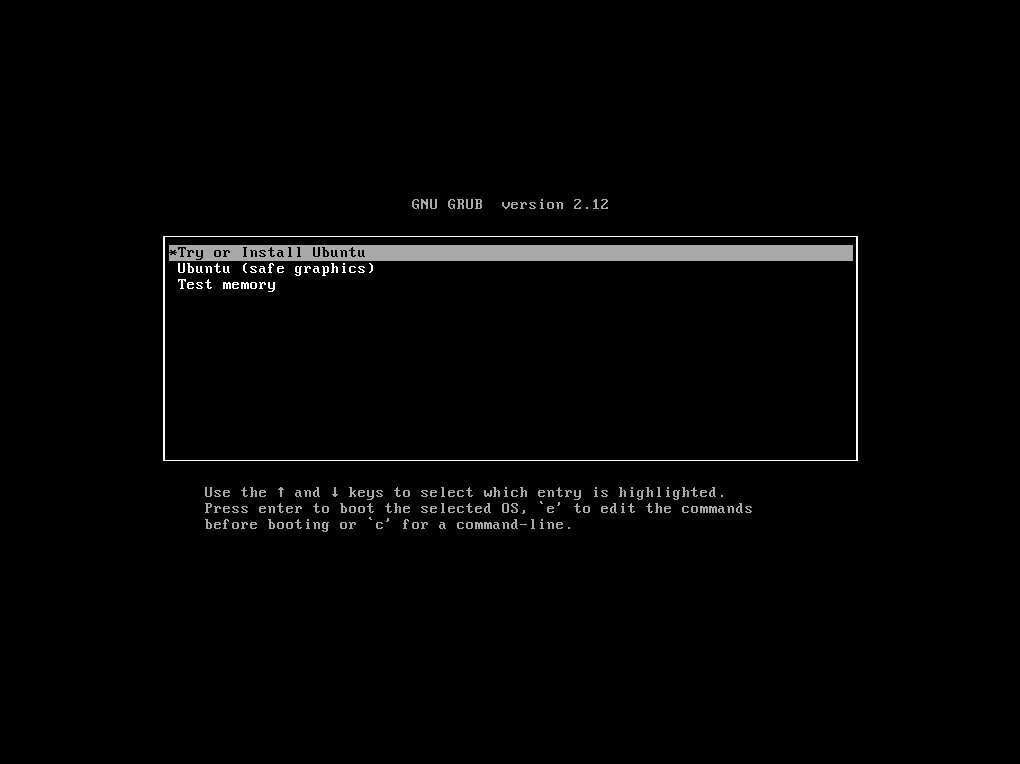
By specifically entering Safe Graphics Mode at boot, Ubuntu bypassed the problematic graphics driver temporarily. This allowed the VM to boot successfully and permanently correct the configuration via guest additions or permanent GRUB modifications.
Once these configurations are set correctly (especially Graphics Controller: VMSVGA and disabling 3D acceleration), the VM will boot consistently without needing Safe Graphics Mode in future boots.

Common errors, including messages like “vmwgfx seems to be running on an unsupported hypervisor,” are easily resolved by changing the graphics controller to “VMSVGA.”

There may also be an instance in which you need to download the dnf package. If you need to download the dnf package you will see a terminal error with ‘dnf’ in the response, as shown in the screen shot below:

This step ensures optimal compatibility between VirtualBox’s graphics capabilities and the Ubuntu VM, providing a smoother, error-free graphical user experience upon boot.
To complete the Ubuntu installation process, here are the key terminal commands you need to type:
- Update the package list:
bash
sudo apt update - Install necessary software:
bash
sudo apt install -y build-essential linux-headers-$(uname -r) - Insert Guest Additions CD:
- Go to the Devices menu in VirtualBox and select “Insert Guest Additions CD”.
- If nothing happens, open the CD image by clicking on it in the dock, right-click on
autorun.sh, and select “Run as a Program”.
- Set the hostname:
bash
sudo hostnamectl set-hostname dbhost1.localnet.com
These commands will help you set up and configure your Ubuntu virtual machine as shown in the video.
Quick Recap:
Adjusting the VirtualBox settings step-by-step helped solve the graphics issue.
Selecting VMSVGA and turning off 3D acceleration fixed most of the boot errors.
Booting Ubuntu once in Safe Graphics Mode showed us exactly where the problem was.
Congratulations! Now your Ubuntu VM is ready for smooth, trouble-free operation!
BitcoinVersus.Tech Editor’s Note:
We volunteer daily to ensure the credibility of the information on this platform is Verifiably True. If you would like to support to help further secure the integrity of our research initiatives, please donate here
BitcoinVersus.tech is not a financial advisor. This media platform reports on financial subjects purely for informational purposes.

Leave a comment