This guide outlines the essential components and step-by-step procedure for establishing an RS-485 serial connection using Ethernet and serial wiring.
It is intended for technicians integrating RS-485 devices with a Mikrotik router and a metering system above a breaker panel.
1. Here are the tools you will need to set up a RS 485 Device:
Miniature flathead screwdriver

– Nuts and bolts that are compatible with black cabinet (server rack)
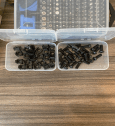
– Crimper for cutting Cat 5 Eth Cable

– Two RS-485 Devices


– Ethernet cable

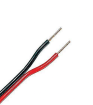
– Red and Black Serial Wire
2. Crimp the ethernet wire and isolate the blue-white striped wire and blue wire
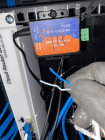
3. Strip the Ethernet of its insulation covering so that the copper wire is showing.

4. Loosen Port A and Port B on the green attachment

5. Place the Striped blue and white wire in Port A and the solid blue wire in Port B

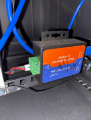
6. Next, grab the 2nd RS-485 detach the green module and loosen Port A and Port B RS-485 from the attachment

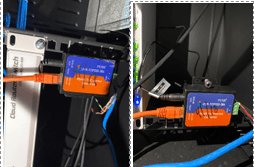
7. Next Grab your red And black serial wires (the other end should be connected to the meter directly above the Breaker Panel)

8. Place the red wire in Port A and the black wire in Port B.
9. Connect the Ethernet cable from the Mikrotik to the RS-485. The RS-485 device should have a corresponding number for the port (port 17 or port 18) connect RS 485 #17 to port 17 and RS485 #18 to port 18.

Congratulations! You’ve just setup your RS-485 serial connection.
BitcoinVersus.Tech Editor’s Note:
We volunteer daily to ensure the credibility of the information on this platform is Verifiably True. If you would like to support to help further secure the integrity of our research initiatives, please donate here
BitcoinVersus.tech is not a financial advisor. This media platform reports on financial subjects purely for informational purposes.

Leave a comment