Key Takeaways
- Do not order a screen until you know the panel is actually the problem. A bad cable, hinge damage, graphics failure, backlight fault, or motherboard issue can look like a dead LCD.
- Match the replacement panel exactly. Size, resolution, connector type and position, touch capability, mounting tabs, refresh rate, and panel thickness can all matter.
- Disconnect power before touching the display cable. Laptop display connectors can carry power as well as video signals.
A laptop with a cracked, striped, black, flickering, or distorted screen can look finished even when the rest of the computer still works perfectly. In many cases, replacing the LCD panel is enough to return the machine to normal operation.
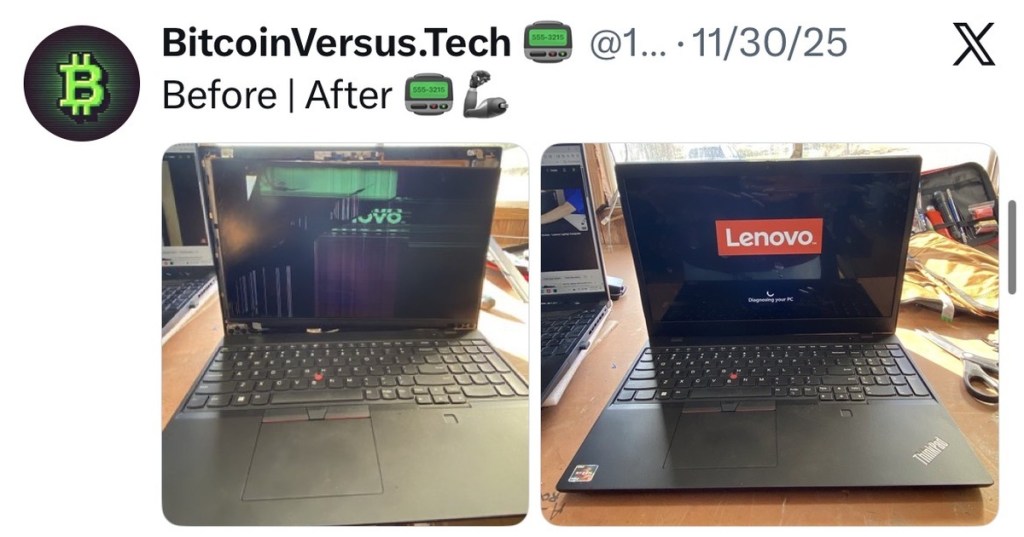
The before-and-after repair shown in the featured image came from a BitcoinVersus.Tech repair project: the laptop first displayed severe vertical corruption, then returned to a normal Lenovo startup screen after the display repair. The important lesson is broader than one ThinkPad. Diagnose first, identify the exact panel second, then replace only what is actually broken.
First Confirm That the Screen Is the Problem
Start with the same basic logic used in our earlier display troubleshooting guide: separate the computer from the display path. If the laptop can drive a normal picture to an external monitor through HDMI, DisplayPort, USB-C, or a dock, the GPU and operating system may still be working even though the internal screen is not.
- Cracked glass, black ink-like blotches, or obvious impact damage: the panel is physically damaged.
- Vertical or horizontal lines that stay in the same place: the panel or its internal electronics may have failed.
- Picture changes when the lid moves: suspect the display cable or hinge area before assuming the LCD itself is bad.
- Very dim picture visible only with a flashlight: the image path may work while the backlight system has failed.
- External monitor works but the internal display stays corrupt: the fault is more likely somewhere in the internal display assembly.
- Both internal and external displays are corrupt: investigate graphics, memory, firmware, or motherboard problems before buying a panel.
On supported ThinkPad models, Lenovo provides an LCD self-test that can display solid-color patterns without relying on the normal operating-system display path. If the panel produces the test correctly, that is useful evidence that the LCD itself can still function.
A Bad Cable Can Look Like a Bad Screen
The internal display cable usually runs from the motherboard through a hinge and into the back of the LCD panel. Every time the lid opens and closes, that cable flexes. A loose, pinched, partially disconnected, or damaged connector can create flickering, intermittent blackouts, lines, color shifts, or blocks of corrupted pixels.
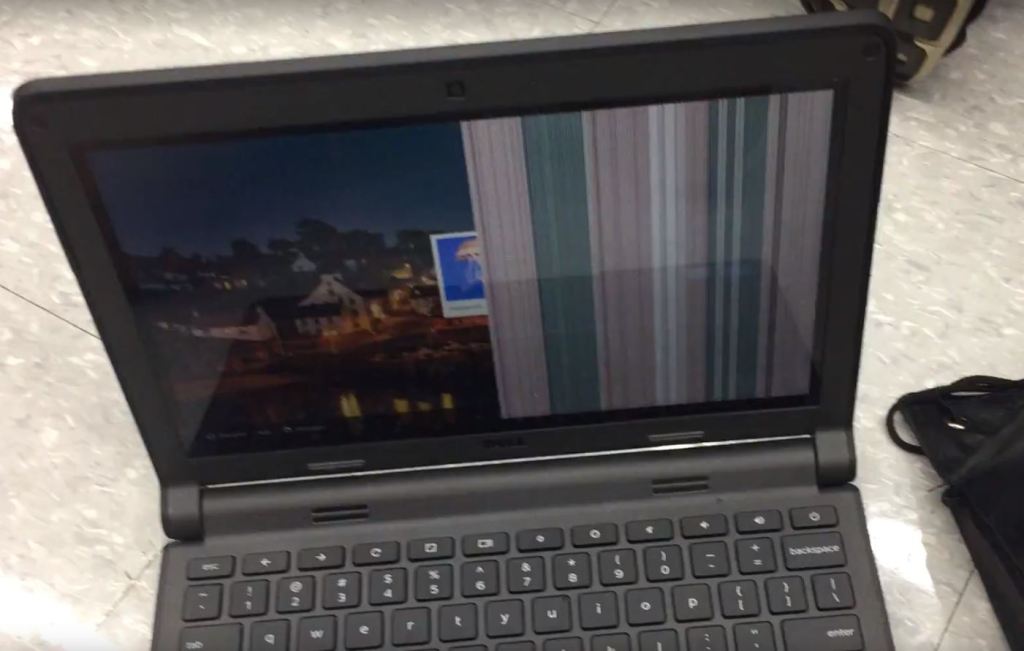
If moving the lid changes the failure, cable routing deserves special attention. Our broader laptop hardware troubleshooting guide covers the same principle: isolate the failing subsystem before replacing parts.
Identify the Exact Replacement Panel
“15.6-inch laptop screen” is not enough information. Two panels with the same diagonal size can use different connectors, resolutions, mounting systems, touch layers, thicknesses, brightness levels, refresh rates, or connector locations.
- Laptop model and machine type: start with the exact model number, not just the product family.
- Panel part number: the safest match usually comes from the label on the original LCD or the manufacturer’s parts list.
- Resolution: 1366×768, 1920×1080, 2560×1440, and other panels are not automatically interchangeable.
- Connector: modern laptops commonly use embedded DisplayPort connectors, but pin count, placement, and cable routing vary.
- Touch vs. non-touch: a touch display may include digitizer hardware and different cabling.
- Mounting style: some panels use side brackets and screws; others are held with stretch-release adhesive strips.
- Refresh rate and panel features: higher-refresh, privacy, HDR, OLED, or wide-gamut panels may require compatible cables and system support.
If the machine uses USB-C for external video during diagnosis, remember that USB-C is only the connector shape; its capabilities depend on the port and cable. Our USB-C cable overview explains why apparently identical USB-C cables can support different functions.
Tools You Usually Need
- Plastic opening picks or a nylon spudger
- Small Phillips screwdrivers or the bit specified by the hardware manual
- Tweezers for adhesive tabs or tape
- Magnetic parts tray or labeled screw organizer
- ESD-conscious work surface
- Replacement bezel adhesive or stretch-release strips if the design requires them
- A known-good replacement panel that matches the original specifications
A metal screwdriver is for screws, not for prying around a live display connector. Plastic tools reduce the chance of gouging the bezel, shorting contacts, or slipping into the LCD surface.
The General Laptop Screen Replacement Process
Every laptop is different, so use the service manual or a model-specific guide whenever possible. The basic flow is usually similar.
- Shut the laptop down completely. Disconnect the charger and peripherals.
- Disconnect or disable the internal battery. Some laptops provide a BIOS battery-disable option; others require opening the bottom cover and physically disconnecting the battery.
- Remove the display bezel carefully. Watch for hidden screws, adhesive, clips, webcam wiring, and microphone cables.
- Release the panel. Depending on the design, remove mounting screws or pull the manufacturer’s stretch-release adhesive tabs slowly and evenly.
- Support the panel before disconnecting it. Do not let its weight hang from the display cable.
- Peel back connector tape and unplug the display cable straight and gently. Do not pry at tiny connector pins.
- Connect the replacement panel. Seat the connector fully and restore any locking tape or bracket exactly as designed.
- Test before final reassembly. Reconnect power only after the panel and cable are safely positioned. Verify the boot logo, brightness, color, backlight, and any touch function.
- Finish the bezel and adhesive only after the test passes. This avoids reopening the display if the panel or connection is wrong.
iFixit’s Lenovo Edge 15 LCD replacement guide shows the same general pattern: remove the bezel, release the panel, protect the attached ribbon connections, disconnect the display hardware, and reverse the process for installation.
Test the New Screen Before Sealing Everything
Before reinstalling every bezel clip or adhesive strip, check the new display while access is still easy. Look for a normal startup logo, even backlighting, full resolution, correct brightness control, no lines or flicker, no pressure marks, and working touch input if the laptop has a touchscreen.
If the replacement panel stays black, power the machine down again before reseating the connector. Do not repeatedly connect or disconnect the display cable while the laptop is powered. A display connector can carry enough power to damage the panel, cable, backlight circuit, or motherboard if pins are shorted during live work.
When a Screen Repair Becomes More Than a Screen Repair
- Broken hinge mounts: a new screen will not solve a lid that cannot support the panel correctly.
- Damaged display cable: replace or reroute the cable if the fault follows lid movement or the connector is visibly damaged.
- Bonded touch assemblies: some systems require replacing the full display assembly rather than only the LCD.
- OLED panels: construction and handling can differ substantially from conventional LCD assemblies.
- Liquid damage: corrosion near the display connector or motherboard may require board-level repair.
- Swollen battery: stop the repair and deal with the battery safely before applying pressure to the chassis.
The Main Repair Rule
A broken-looking laptop screen does not automatically mean “buy a screen.” Confirm whether the failure follows the panel, the cable, the backlight, or the graphics path. Once the panel is proven bad, match the replacement exactly, disconnect battery power, protect the display connector, and test the repair before closing the bezel.
That method is what turns a frustrating wall of lines and distortion into the clean before-and-after result shown at the top of this article.
BitcoinVersus.Tech content is provided for informational and educational purposes.


Leave a Reply