AxeOS is the web interface most Bitaxe owners meet before they ever think about voltage, frequency or overclocking. The practical job of a first setup is simpler: get the miner onto a stable 2.4 GHz network, point it at a pool with your own Bitcoin address, verify accepted shares, and make sure you know how to recover the device before changing anything else.
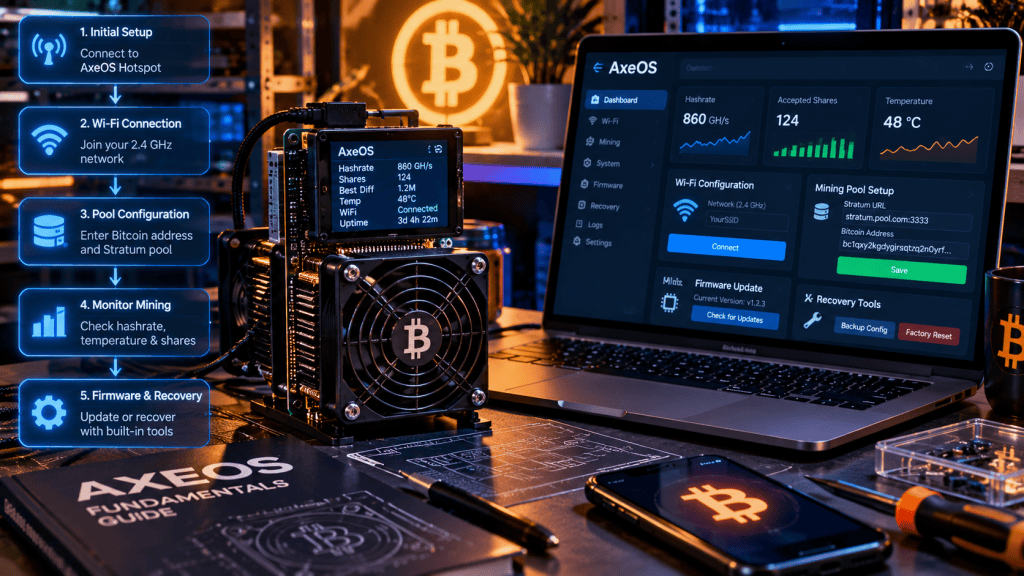
1. Start With the Setup Hotspot
On first boot, a Bitaxe that is not already connected to a network exposes a temporary Wi-Fi access point, typically named something like Bitaxe_XXXX. Join that network from a phone or laptop and open the captive setup page. If the page does not appear automatically, the current setup documentation points users to 192.168.4.1.
Enter the SSID and password for a 2.4 GHz Wi-Fi network, save, and restart. The Bitaxe ESP32 platform does not rely on 5 GHz Wi-Fi for this workflow, so a 5 GHz-only network is a common first-boot failure. A recent step-by-step setup reference also notes that weak signal, guest-network isolation and incorrect credentials are common causes of connection problems.
2. Open AxeOS on Your Local Network
After restart, the miner joins your normal network and displays or obtains a local IP address. Open that address in a browser, or use the local hostname when supported, to reach AxeOS. The interface exposes system information, ASIC settings and statistics through both its web dashboard and API endpoints documented in the Bitaxe ESP-Miner repository.
For a deeper explanation of the interface itself, BitcoinVersus.tech’s earlier AxeOS fundamentals overview explains how the open-source firmware stack is organized. The newer telemetry guide focuses specifically on reading the dashboard before touching tuning controls.
3. Replace the Default Pool Address
The next mandatory step is the pool configuration. A typical solo-mining setup requires a Stratum host, port, your Bitcoin address in the user field and a password value such as x. The important part is the address: do not assume the factory value belongs to you.
After entering your own Bitcoin address, save and restart, then confirm that accepted shares begin increasing. If you configure a fallback pool, verify that its user field also contains your own address. BitcoinVersus.tech recently covered how AxeOS can use encrypted Stratum V2 connectivity, but plain Stratum V1 remains the easier starting point for a first setup.
4. Read the Dashboard Before You Tune
A successful setup is not confirmed by a spinning fan or a hashrate number alone. Check that the miner remains connected, accepted shares increase, rejected shares stay low, ASIC temperature is stable and power input is not collapsing under load. Pool-side hashrate should also be compared over a meaningful time window because short windows can fluctuate heavily.
That measurement discipline matters because local display values can be misleading when firmware or hardware behaves unexpectedly. BitcoinVersus.tech’s recent firmware-audit story is a good reminder that pool-side evidence and raw system data are useful checks against a single dashboard number.
5. Know the Update and Recovery Path First
Before experimenting with tuning, record your network and pool settings and confirm how you would recover the device. The ESP-Miner project supports factory flashing and configuration flashing through Bitaxe tooling, and the project documentation notes that the firmware image must match the hardware revision.
BitcoinVersus.tech has a dedicated Bitaxe firmware-update guide, while the Bitaxe Gamma troubleshooting overview covers a broader set of failure symptoms. Those recovery references are worth saving before an update rather than searching for them after a failed flash.
AxeOS Fundamentals in One Sequence
The clean first-boot sequence is: power the miner, join the temporary AxeOS hotspot, connect to stable 2.4 GHz Wi-Fi, reopen AxeOS on the local network, replace the pool user with your own Bitcoin address, restart, verify accepted shares and temperatures, and only then consider updates or tuning.
That order matters. AxeOS gives a small open-source miner many of the same operational building blocks found in larger mining fleets: network provisioning, telemetry, pool failover, firmware management, logs and performance controls. Learning those fundamentals first makes every later tuning or troubleshooting step easier to interpret.
BitcoinVersus.Tech Editor’s Note:
We volunteer daily to ensure the credibility of the information on this platform is Verifiably True. If you would like to support to help further secure the integrity of our research initiatives, please donate here: 3C9o19EH5HSiwEPyCTmEKzxhNCbo2X6TTb
BitcoinVersus.tech is not a financial advisor. This media platform reports on financial subjects purely for informational purposes.


Leave a comment