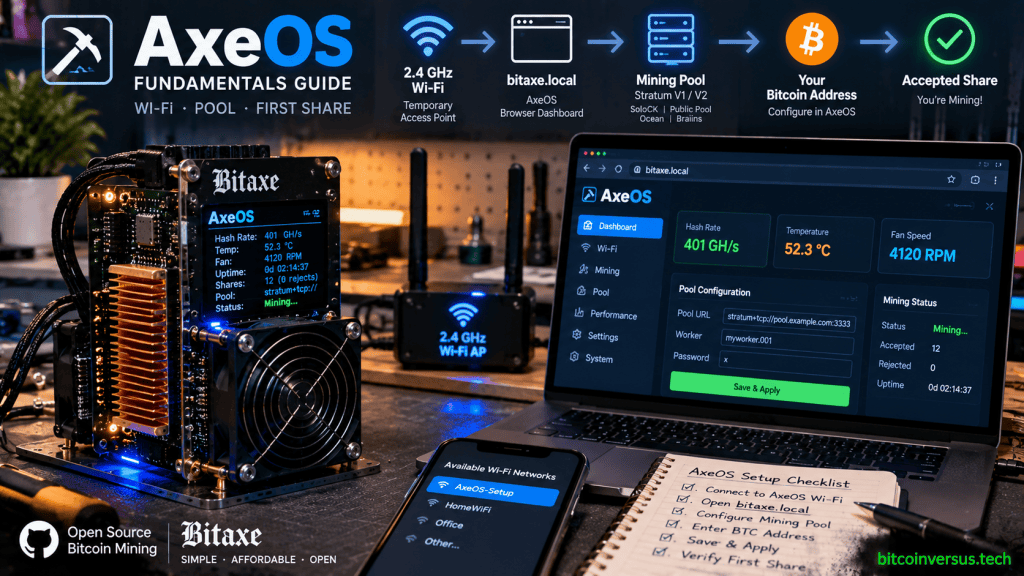
AxeOS Fundamentals Part 3 starts at the point every Bitaxe owner eventually reaches: getting a new miner from first power-on to its first accepted share without confusing Wi-Fi, pool credentials and the payout address.
The sequence is simple when each layer is handled separately. The Bitaxe first creates a temporary local Wi-Fi access point. AxeOS then stores the home-network credentials. After the miner joins that network, the operator opens the local dashboard, enters a mining-pool endpoint and replaces the factory Stratum user with a Bitcoin address they control.
If you are starting from zero, read Part 1 on how AxeOS, ESP-Miner and Bitaxe fit together. Part 2 explains how to read AxeOS telemetry before tuning. This installment focuses only on bringing a stock miner online correctly.
1. Power the correct hardware with the correct supply
Do not assume every Bitaxe generation uses the same input voltage. Check the board and vendor documentation before connecting power. The original open-source hardware documentation specifically warns that applying the wrong voltage can damage a board.
Upstream ESP-Miner documentation is the authoritative starting point for the software side. Current AxeOS is the browser interface served by ESP-Miner on the device itself, so no cloud account or desktop application is required for ordinary configuration.
2. Join the temporary Bitaxe Wi-Fi
A factory-reset or unconfigured Bitaxe broadcasts a temporary network with a name similar to Bitaxe_XXXX. Join it from a phone or laptop. If the captive setup page does not appear automatically, current setup documentation uses 192.168.4.1 as the local configuration address.
Enter the SSID and password for the network the miner will use. Bitaxe-class ESP32 hardware uses 2.4 GHz Wi-Fi, so a 5 GHz-only network will not work. Save the configuration and restart the miner.
One community example shows how the open Bitaxe ecosystem extends the same basic AxeOS workflow across different form factors.
3. Find AxeOS on your home network
After reboot, the miner should join the configured network. Current ESP-Miner releases support mDNS, so http://bitaxe.local can work on compatible networks. The IP address shown by the miner or router remains the fallback.
That local-first design is important. You are connecting directly to the web server running on the miner. If the page cannot be reached, troubleshoot local networking before assuming the ASIC itself has failed.
4. Replace the payout address before mining
This is the step to verify twice. The Stratum user field commonly contains the Bitcoin address that determines where a solo-mining reward is paid. Replace any factory or demonstration address with an on-chain Bitcoin receiving address you control. If a fallback pool is configured, verify its user field too.
A current setup walkthrough updated for 2026 documents the same flow: connect to the temporary Bitaxe network, configure 2.4 GHz Wi-Fi, reopen AxeOS from the local network, then replace the Stratum user with your own on-chain address.
The following English-language Solo Satoshi walkthrough shows the physical setup and AxeOS interface directly.
5. Understand the four pool fields
Host identifies the pool server. Port identifies the service endpoint. User normally carries your Bitcoin address plus an optional worker label. Password is pool-specific and is often simply x for public solo pools.
Do not copy a random pool configuration from an old screenshot. Pool hosts, ports, TLS settings and protocol support can change. Confirm the current values with the pool operator before saving them.
For operators ready to move beyond the basic connection, BitcoinVersus.Tech has a separate guide to encrypted Stratum V2 through AxeOS. Start with a working baseline first, then change protocols deliberately.
6. Save, restart and prove the miner is actually working
After changing Wi-Fi or pool configuration, save the settings and restart when AxeOS requests it. Back on the dashboard, verify an active pool connection, non-zero hashrate and eventually accepted shares. One accepted share proves more than a spinning fan: the miner received work, hashed it, found a result above the pool’s share target and successfully returned that result.
Do not confuse accepted shares with finding a Bitcoin block. Shares are pool-side proof that the miner is participating correctly. A valid network block is dramatically harder.
7. Keep recovery separate from tuning
If first-time setup fails, do not immediately raise frequency or voltage. Fix Wi-Fi, pool configuration, power, firmware and address settings first. Advanced tuning adds variables and makes basic troubleshooting harder.
For firmware-specific recovery, BitcoinVersus.Tech’s AxeOS firmware update guide provides additional context. Current unified ESP-Miner releases embed AxeOS into the main firmware binary, so always compare older flashing instructions with the current upstream release before applying them.
The fundamentals checklist
The complete first-boot chain is: correct power, temporary Bitaxe Wi-Fi, 2.4 GHz home network, local AxeOS access, verified pool host and port, your own Bitcoin address in every active Stratum user field, save and restart, then confirm hashrate and accepted shares.
Once that chain is stable, AxeOS becomes much more than a setup page. It becomes a compact laboratory for learning the same networking, thermal, power, firmware and Stratum concepts that appear in much larger Bitcoin mining systems.
BitcoinVersus.Tech
Advertisement: Follow BitcoinVersus.Tech for independent coverage of Bitcoin, ASIC hardware, open-source mining, semiconductors, artificial intelligence, data centers and energy.
BitcoinVersus.Tech Editor’s Note:
We volunteer daily to ensure the credibility of the information on this platform is Verifiably True. If you would like to support to help further secure the integrity of our research initiatives, please donate here: 3C9o19EH5HSiwEPyCTmEKzxhNCbo2X6TTb
BitcoinVersus.tech is not a financial advisor. This media platform reports on financial subjects purely for informational purposes.


Leave a Reply