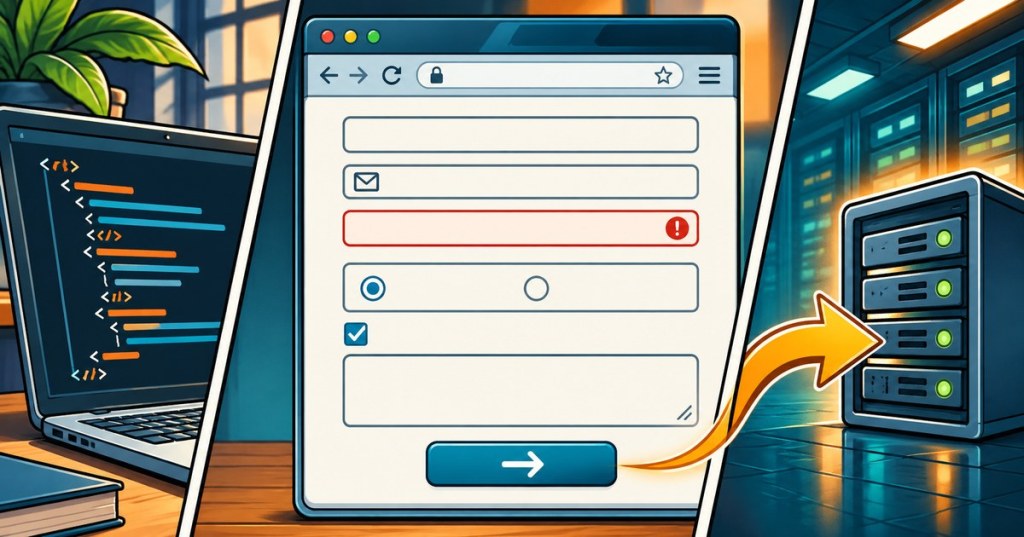
An HTML form collects information through browser controls such as text fields, radio buttons, checkboxes and menus. The <form> element specifies where and how that information is submitted. Building a usable form requires more than choosing an <input> type: labels, grouping, keyboard access, validation and server handling all matter. This lesson constructs and explains a complete, accessible contact form using standards-based HTML.
This is OSHTML.004, the next lesson after OSHTML.003: Attributes. It assumes familiarity with HTML elements and nesting and document structure. We now use those fundamentals to build a working form interface, while distinguishing browser behavior from functionality that requires a server.
Learning objectives
- Explain the roles of
form,action,method,name,id, andlabel. - Build accessible text, email, search, radio, checkbox, select and textarea controls.
- Group related choices with
fieldsetandlegend. - Distinguish GET query strings from POST request bodies and explain what HTML alone cannot secure.
- Use native validation with
required, input types, minimum lengths and appropriate constraints. - Inspect the submitted name/value pairs and diagnose common form mistakes.
How a browser form works
A form contains controls associated with that form. On submission, the browser constructs an entry list from eligible controls and sends it according to the chosen method and encoding. The action attribute identifies the destination. The method attribute normally selects get or post. A field’s name is its submission key; id mainly identifies the element and connects it to a label. They are not interchangeable. Consult MDN’s form element reference for the formal attributes and submission details.
A <button> inside a form defaults to submission unless its type says otherwise. Prefer explicit type="submit" for clarity. A separate button that triggers a local JavaScript action should generally use type="button" so it does not submit the form accidentally.
First demonstration: a GET search form
<form action="/search" method="get" role="search">
  <label for="search-term">Search articles</label>
  <input
    type="search"
    id="search-term"
    name="q"
    autocomplete="off"
    required
  >
  <button type="submit">Search</button>
</form>
Assume the website implements a /search endpoint. If the user enters ASIC cooling, the browser might navigate to a URL like /search?q=ASIC+cooling. The path is only an example; copying this into a static file does not create a working search service. GET is suitable for retrieval and bookmarking, not confidential values or destructive actions. URLs can appear in history, logs, and shared links. HTTP form submission is discussed in MDN’s forms tutorial.
Labels are functional, not decoration
Each data-entry control needs an accessible name. A visible <label for="email"> associates with the control whose id is email. Clicking the label can focus the field, and many assistive technologies use the relationship to announce the expected input. Placeholder text is not a substitute: it may disappear when the user types and does not reliably communicate a field’s meaning.
<label for="email">Email address</label>
<input id="email" name="email" type="email"
       autocomplete="email" required>
The label’s for matches the input’s id; the input’s name is the submission key. A label can also contain the control as an implicit association, but explicit pairs are easier to inspect in more complex pages. Follow MDN’s accessible text labels guidance when naming fields.
Video lesson: building forms and input controls
Dave Gray walks through the form container, text/password/number controls, select menus, fieldsets, radio buttons, checkboxes and textarea controls. His demonstration also discusses GET versus POST near the end. Pause at the fieldset section and inspect how the visible legend relates to a group of radio choices.
Video: Dave Gray — HTML Forms and Inputs, HTML5 Tutorial for Beginners (2022). Relevant chapters: form at 03:24, fieldset/legend at 26:03, radio controls at 27:39, textarea at 33:22, and GET/POST at 40:45.
Choosing the correct input controls
type="text"accepts general single-line text.type="email"provides a browser email-format check, but not proof an email address exists.type="search"is appropriate for search terms and can have specialized browser presentation.type="password"obscures displayed characters; it does not encrypt a request on its own.type="number"represents numeric input with constraints such asmin,maxandstep, but may be inappropriate for numeric-looking identifiers such as ZIP codes.<textarea>accepts multiline text; its initial value belongs between its tags.<select>with<option>offers a selection list.- Checkboxes allow independently checked choices; radio buttons with a shared
nameestablish a mutually exclusive group.
When forms contain related options, a <fieldset> and <legend> express the group’s question for both sighted users and assistive technology. Keep each radio control’s own label and give each option a meaningful value—the visible label is not automatically the value submitted.
<fieldset>
  <legend>Preferred contact method</legend>
  <input type="radio" id="reply-email"
         name="contact" value="email" required>
  <label for="reply-email">Email</label>
  <input type="radio" id="reply-phone"
         name="contact" value="phone">
  <label for="reply-phone">Phone</label>
</fieldset>
The grouping example has one radio name and two option values. Choosing one automatically deselects the other within the same group. In contrast, separate checkboxes may submit multiple values or none, depending on the selected controls. Unchecked checkboxes are generally omitted from the submitted form data; servers must not assume an absent checkbox means the literal string “false”.
A complete contact-form HTML document
This sample is a full HTML document. Save it as contact.html and open it locally to inspect keyboard navigation, fields and browser validation. It deliberately uses /api/contact as a placeholder; a real deployed backend endpoint, HTTPS configuration and server-side validation are required before accepting actual messages. Do not enter real credentials or sensitive personal information into an untrusted test form.
<!doctype html>
<html lang="en">
<head>
  <meta charset="utf-8">
  <meta name="viewport" content="width=device-width, initial-scale=1">
  <title>Contact form practice</title>
</head>
<body>
  <main>
    <h1>Contact the IT team</h1>
    <!-- /api/contact is a PLACEHOLDER. A real backend is required. -->
    <form action="/api/contact" method="post">
      <p>
        <label for="full-name">Your name</label>
        <input id="full-name" name="full_name" type="text"
               autocomplete="name" minlength="2" required>
      </p>
      <p>
        <label for="email">Email address</label>
        <input id="email" name="email" type="email"
               autocomplete="email" required>
      </p>
      <fieldset>
        <legend>Which department?</legend>
        <p>
          <input id="support" type="radio" name="department"
                 value="support" required>
          <label for="support">IT Support</label>
        </p>
        <p>
          <input id="network" type="radio" name="department"
                 value="network">
          <label for="network">Networking</label>
        </p>
      </fieldset>
      <p>
        <label for="priority">Priority</label>
        <select id="priority" name="priority">
          <option value="normal">Normal</option>
          <option value="urgent">Urgent</option>
        </select>
      </p>
      <p>
        <label for="details">Issue description</label>
        <textarea id="details" name="details"
                  rows="4" minlength="10" required></textarea>
      </p>
      <p>
        <input id="permission" type="checkbox"
               name="permission" value="yes" required>
        <label for="permission">You may contact me about this request.</label>
      </p>
      <button type="submit">Send request</button>
    </form>
  </main>
</body>
</html>
The example uses autocomplete hints, visible label associations, grouped radio buttons, a select menu, multiline input, a required consent checkbox and a submit button. The user can try focus order with Tab, switch radio options with keyboard controls and trigger the browser’s standard validation warnings by leaving required fields empty. A backend that receives the POST must still validate every value, implement appropriate request protections and handle errors.
Video lesson: complete form plus validation
Web Dev Simplified demonstrates a registration form with labels, inputs, select/textarea controls, form attributes and validation. Compare its example with the contact form above: each control needs a sensible label, a submission name, and the correct grouping or constraints for its intended data.
Video: Web Dev Simplified — Learn HTML Forms in 25 Minutes (2019). Covers form attributes, GET/POST, labels, choice controls and native validation in an English-language walkthrough.
GET versus POST and security
GET encodes form data into the request URL’s query component. It suits read-only operations such as searching and filtering. POST normally sends form data in the HTTP request body and is commonly used to submit changes. Neither method is itself a confidentiality or authorization guarantee. HTTPS encrypts the transport connection; sensitive inputs additionally require appropriate authentication, access control, logging rules and server-side validation.
Never trust an HTML attribute such as required, min or maxlength as your only enforcement. A person or script can construct requests without using your browser interface. Server logic must validate formats and lengths, check authorization, protect against injection and cross-site request forgery where applicable, and handle duplicate submissions. The browser can improve usability but cannot be the final trust boundary.
Native validation: what it checks
Browsers implement constraint validation for eligible controls. required checks that a required entry has been supplied, type="email" checks a basic email syntax, minlength limits text length, and min, max and step constrain appropriate numeric controls. Some validation features do not apply to every input type. Use the correct type and test with real browsers, including touch interfaces and assistive technology. MDN’s client-side form validation guide explains their scope and limitations.
<label for="quantity">How many machines?</label>
<input id="quantity" name="quantity" type="number"
       min="1" max="100" step="1" required>

<label for="summary">Short issue summary</label>
<input id="summary" name="summary" type="text"
       minlength="10" maxlength="120" required>
For example, leaving either required control empty normally prevents ordinary form submission in a validating browser. A non-integer value for the quantity can be invalid under the chosen step rule. These checks do not prove the quantity corresponds to a real inventory or that the description is accurate. Client-side validation remains a user-interface aid, not a substitute for authoritative backend checks.
Common errors to fix
- A form field has an
idbut noname: the label may work, but the field’s value often will not be submitted. - The label’s
fordoes not match the control’sid: clicking the label may fail to focus the intended control. - Several radio options have different names: the options no longer behave as one mutually exclusive group.
- A placeholder is used instead of an actual label: users can lose necessary context.
- A button lacks the intended type: an ordinary button may accidentally submit the entire form.
- A GET form transmits passwords or private messages in the URL: switch to an appropriate POST workflow over HTTPS and design secure backend handling.
- An HTML
actionpoints to a path that does not exist: the browser can assemble a request, but the server cannot complete the operation. - Validation exists only in the browser: direct HTTP requests can bypass it; validate on the server too.
Practice lab
- Build a hardware-support request form with a clear title and fields for contact name, email, equipment type and symptom summary.
- Add radio options for support urgency, with one fieldset and legend.
- Make the email address and summary required, and set a reasonable minimum summary length.
- Try submitting an empty form and observe built-in validation messages.
- Use browser Developer Tools to inspect which names and values would be submitted. Do not send private information to an endpoint you don’t control.
- Explain what the backend would still need to validate and how a server should respond to an invalid request.
Knowledge check and answers
Questions: What is the distinction between id and name? Why pair label for with a control’s id? Why is a shared radio name important? What data normally appears in a GET URL? Does type="password" encrypt an HTTP request? Is required sufficient server-side security?
Answers: The id identifies an element and supports label association; name supplies its submission key. Matching a label to a control improves interaction and accessibility. Radios sharing a name form a choice group. GET attaches entered values to query parameters. Password presentation does not encrypt transport. Client-side required constraints are bypassable and must be backed by server-side validation.
Sources and related lessons
Primary references: MDN: form element; MDN: forms and buttons; MDN: structuring a web form; MDN: validation; MDN: accessible names and labels. For JavaScript-side enhancements see OSJavaScript.004. The next HTML lesson can develop tables, media, or document accessibility in further detail without repeating these form basics.
Editor’s Note: We volunteer daily to ensure the credibility of the information on this platform is Verifiably True. If you would like to support our work and help further secure the integrity of our research initiatives, please scan the QR code below to donate 5,000 sats.
For mobile scanning, open this lesson on a laptop or larger screen and scan the original QR image using a compatible Bitcoin wallet. Confirm the receiving address before sending: 3C9o19EH5HSiwEPyCTmEKzxhNCbo2X6TTb.
BitcoinVersus.tech is not a financial advisor. This media platform reports on financial subjects purely for informational purposes.


Leave a Reply