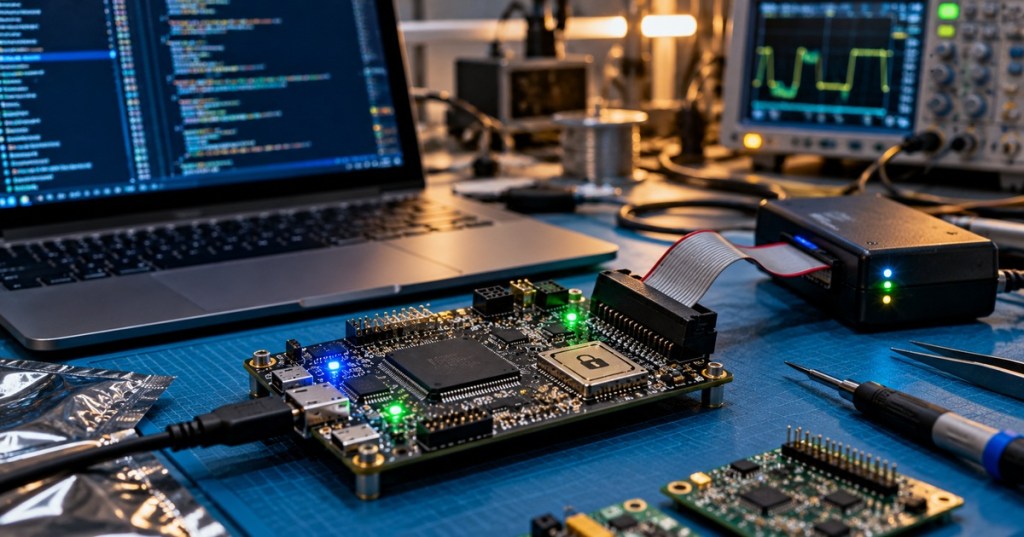
A firmware update should prove two things before a device trusts it: the image has not changed, and the image came from an authorized signer. A checksum can detect accidental corruption, but a cryptographic signature can also establish authenticity when the verification key is anchored in a trusted boot path.
This lesson follows OSFTC.010: Firmware Crash Logs and Fault Recovery. OSFTC.010 focused on evidence after firmware fails. OSFTC.011 moves earlier in the lifecycle: preventing unauthorized or obsolete firmware from becoming trusted code in the first place.
The Zephyr Project demonstrates MCUboot image signing and the basic secure-update trust model.
Elementary Overview
Imagine a controller receives a new firmware file over USB, Ethernet, Wi-Fi, Bluetooth, CAN, or a service laptop. The device should not execute that file merely because its filename, version label, or checksum looks correct. A secure update design adds a trusted verification step before new code becomes active.
A typical design hashes the firmware image, signs that hash with a protected private key during the release process, and stores the matching public verification key in a protected bootloader, immutable boot stage, secure element, one-time-programmable region, or another hardware-rooted trust mechanism. At boot or update time, the device verifies the signature before allowing the image to execute.
Learning Objectives
- Distinguish hashes, checksums, digital signatures, encryption, and secure boot.
- Explain the difference between firmware integrity and firmware authenticity.
- Describe a root of trust and chain of trust.
- Identify the technician-visible parts of a signed firmware image and secure update workflow.
- Explain A/B image slots, test boots, image confirmation, and automatic rollback.
- Explain anti-rollback and security counters.
- Recognize why private signing keys must remain outside deployed devices.
- Verify firmware version, signature state, slot state, boot reason, and rollback behavior after an update.
- Troubleshoot common secure-boot and signed-update failures without bypassing security controls.
Checksum Is Not the Same as Signature
A checksum or cryptographic hash answers an integrity question: did these bytes change? If one bit changes, the calculated value should change. That is useful for detecting corrupted downloads and damaged flash.
A digital signature adds an authenticity question: was this image authorized by the holder of the trusted private key? In a public-key system, the release organization signs with a private key. The device verifies with the corresponding public key. The private key should not be present in production firmware or ordinary technician toolkits.
This distinction matters because an attacker who can replace both an image and its ordinary checksum can still make the checksum match. A properly implemented signature is different because the attacker should not possess the release-signing private key.
Integrity, Authenticity, and Confidentiality
- Integrity: the firmware has not been modified unexpectedly.
- Authenticity: the firmware was approved by an authorized signing identity.
- Confidentiality: unauthorized parties cannot read the firmware contents.
Signing and encryption solve different problems. A signed image can be fully readable while still being protected against unauthorized modification. An encrypted image can hide its contents but still require a separate authenticity mechanism. Do not treat encryption alone as proof that firmware is trusted.
The Root of Trust
Secure boot only works if the first verifier can itself be trusted. That starting point is commonly called a root of trust. Depending on the platform, it may be ROM code inside the microcontroller, immutable boot code, a public-key hash stored in OTP fuses, a hardware security engine, a secure element, or a protected first-stage bootloader.
Each trusted stage verifies the next stage before transferring control. That creates a chain of trust. If an attacker can replace the first verifier or replace its trusted public key without authorization, later signature checks can be bypassed. Technicians therefore need to know which parts of the boot chain are mutable and which are hardware-protected.
NIST SP 800-193 organizes firmware resiliency around three broad capabilities: protect firmware from unauthorized changes, detect unauthorized changes, and recover securely when corruption or attack occurs. Its authenticated-update guidance specifically relies on digital signatures for firmware-update authenticity and integrity.
The Linux Foundation presentation shows secure and encrypted Zephyr boot using MCUboot, hardware-backed keys, OTP storage, and TrustZone-capable devices.
How a Signed Firmware Image Is Built
- The release build produces the firmware binary or hexadecimal image.
- A cryptographic hash is calculated over the defined signed region.
- The release system signs that hash with an authorized private key.
- Image metadata may add version, security counter, image size, hardware identifier, dependency information, or other protected fields.
- The signed image is distributed through the approved update channel.
- The device or bootloader calculates its own hash and verifies the signature using the trusted public key.
- The image is rejected if verification fails.
- If verification passes, update policy then checks version, hardware compatibility, slot state, rollback rules, and other conditions before boot.
MCUboot as a Practical Example
MCUboot is a widely used secure bootloader for 32-bit microcontrollers and is integrated with Zephyr and other embedded platforms. Its current documentation recommends using imgtool for key and image operations. MCUboot supports RSA, ECDSA, and Ed25519 signing configurations depending on build options.
A development workflow can generate a signing key with a command such as:
./scripts/imgtool.py keygen -k image_sign.pem -t ecdsa-p256The exact production process should normally move the private key into controlled release infrastructure, ideally using an HSM or equivalent protected signing service rather than leaving production signing keys on ordinary developer workstations. The device needs verification material such as the public key or its trusted hash, not the private signing key.
Public Key on Device, Private Key Off Device
This is one of the most important field concepts. The private key signs releases. The public key verifies releases. A technician should not copy a production private key into a programmer, service laptop, device filesystem, firmware repository, or removable media used in normal field service.
If a production signing private key is exposed, an unauthorized party may be able to create firmware that looks legitimately signed. That is a release-security incident, not merely a lost password. Key rotation, revocation, device trust-anchor updates, and fleet remediation may then be required.
A/B Firmware Slots
Many resilient update systems divide flash into two application regions. Slot A contains the running image. Slot B receives the candidate update. The bootloader can verify the inactive image before switching execution to it.
This design reduces the chance that an interrupted write destroys the only bootable application. It also supports controlled rollback if the new image verifies cryptographically but fails operationally after boot.
This connects directly to OSFTC.003: Firmware Backup and Recovery. Backup and rollback preserve availability; signatures and secure boot add authorization to that recovery path.
Test Boot, Confirm, or Revert
MCUboot supports update modes in which a new image is booted on a trial basis. The application performs self-tests and then marks the image as confirmed. If the candidate does not confirm successfully, the bootloader can revert to the previously working image on a later reset.
A secure signature cannot prove that the application is bug-free. It only proves that the image is the one authorized by the signer and has not been modified. Runtime health checks are still required. Useful confirmation criteria can include successful initialization, storage mount, network bring-up, sensor communication, watchdog operation, required peripheral discovery, and critical service startup.
Anti-Rollback Protection
A correctly signed older release may still contain a known vulnerability. Anti-rollback prevents a device from accepting an image older than the permitted security state even when that older image has a valid signature.
MCUboot documents both version-based downgrade prevention and security-counter approaches. A hardware-backed security counter can be stored in trusted nonvolatile storage and compared with the signed image’s protected security value. The new image must meet the platform’s monotonic policy before it can become active.
A recent embedded-systems discussion illustrates the field reality of anti-rollback counters stored in one-time-programmable memory. Community discussion is useful context, but the actual device policy must come from the silicon vendor and product security design.
Why Version Number Alone Can Be Weak
A version string stored only in ordinary writable flash may be altered by compromised software. Stronger anti-rollback designs anchor the accepted security state in a protected counter, OTP field, secure element, trusted execution environment, or other storage that unauthorized application code cannot simply reset.
Technicians should distinguish a user-facing software version such as 3.4.1 from a security counter. A maintenance release may intentionally reuse a product-family versioning pattern while still incrementing the security counter because a vulnerability has been fixed.
Secure Boot Does Not Mean the Same Thing as Encrypted Boot
Secure boot is fundamentally about deciding which code is trusted to execute. Encryption hides firmware contents. Some systems do both, but technicians should verify which controls are actually enabled. A device can enforce signed firmware without encrypting the image, and it can encrypt an image without establishing a trustworthy chain of execution unless authentication is also enforced.
Microchip demonstrates secure boot using a hardware secure element to verify signed microcontroller firmware against protected trust material.
Hardware Security Elements
A secure element can store trust material and perform cryptographic operations in hardware designed to resist extraction or tampering. For example, Microchip’s ATECC608-family secure-boot workflow uses a protected public-key or digest configuration so the host microcontroller can validate signed firmware without storing sensitive trust state in ordinary writable memory.
A secure element is not automatically required on every product. Some microcontrollers already provide ROM secure boot, OTP key hashes, protected flash regions, hardware security engines, TrustZone, or vendor-specific secure lifecycle states. The correct architecture depends on the threat model, silicon features, manufacturing process, service requirements, and cost.
Key Rotation
Long-lived products need a way to replace signing authority without disabling secure boot. A safe key-rotation design may trust multiple verification keys temporarily, use a higher-level root key to authorize subordinate keys, or deliver a signed trust-store update through the existing chain of trust.
Do not overwrite the only trusted public key casually. If the update fails halfway through or the new key was provisioned incorrectly, the device may reject all future legitimate releases. Key migration should have a documented recovery path and should be tested on sacrificial hardware before fleet deployment.
Debug Ports Become Part of the Security Boundary
SWD, JTAG, UART boot modes, ROM download modes, external flash programmers, test pads, and recovery straps can provide legitimate service access. They can also bypass a security architecture if they permit unauthorized rewriting of the bootloader or trust anchors.
This does not mean technicians should disable every recovery path blindly. It means debug and recovery states must follow the product’s lifecycle design. Some devices permanently lock debug access; others allow authenticated debug, service-unlock certificates, physical-presence recovery, or factory-only provisioning modes.
Review OSFTC.004: Firmware Flashing Interfaces before using a programmer on a secured device. A programming method that works on an unsecured development board may intentionally fail on production hardware.
Field Verification After a Secure Update
- Confirm the exact hardware model and board revision.
- Record the currently active firmware version and security state.
- Verify the update file came from the approved distribution source.
- Verify the expected hash or release manifest when the service procedure provides one.
- Confirm the update package is signed for the correct product and hardware family.
- Record which image slot is active before the update.
- Perform the update through the approved interface and power conditions.
- Capture bootloader and serial logs where available.
- Confirm signature verification succeeded and the expected version booted.
- Verify application self-tests and required peripherals.
- Confirm the image was marked permanent or confirmed only after health checks pass.
- Reboot again to prove the device does not unexpectedly revert.
- Check the rollback/security counter state when exposed by service tooling.
- Verify that an older unauthorized image is rejected during a controlled lab test, not on an uncontrolled production device.
- Attach logs, version data, and final state to the service record.
Common Secure-Update Failure Patterns
- Image rejected immediately: wrong signing key, damaged package, wrong product ID, unsupported algorithm, malformed header, or corrupt metadata.
- Image verifies but will not install: insufficient slot size, incompatible flash layout, hardware-revision mismatch, dependency failure, or anti-rollback policy.
- New image boots once then old image returns: test image was never confirmed, health check failed, watchdog reset occurred, or the bootloader intentionally reverted.
- Device reports rollback violation: candidate security counter or protected version is below the accepted value.
- Development image works but production image fails: development and production bootloaders may trust different signing keys or lifecycle states.
- Programmer cannot attach: debug may be intentionally locked by production security configuration.
- Signature verification fails after transfer: investigate file truncation, transport corruption, metadata modification, wrong image offset, or unexpected post-sign processing.
- Bootloader accepts image but application later crashes: cryptographic authenticity passed; troubleshoot runtime behavior using OSFTC.010.
Do Not Bypass the Signature Check to “Make It Work”
A signature failure is evidence. Rebuilding a bootloader with verification disabled, erasing trust anchors, or forcing an unsigned image onto production hardware may destroy both security and diagnostic evidence. If the device rejects an image, first prove the image identity, hardware target, signing chain, metadata, counter state, and flash layout.
If a sanctioned recovery procedure requires a local programmer or physical-presence mode, record why it is authorized and what security state must be restored afterward. Recovery should return the device to a trusted state, not permanently lower its protections.
Technician Troubleshooting Sequence
- Identify exact device, board revision, bootloader version, and currently active image.
- Capture serial or boot logs before retrying.
- Verify the release file and manifest against the approved source.
- Confirm whether the device expects development, production, or rotated signing keys.
- Check image header, product identifier, version, and security counter.
- Verify slot sizes and flash offsets.
- Confirm the update was not altered after signing.
- Check whether the candidate image is in test, permanent, pending, or rejected state.
- Review reset cause and watchdog history using OSFTC.005.
- If external flash is involved, verify the device and image region using OSFTC.007.
- Use only the documented recovery path.
- After recovery, prove secure verification is active again.
Hands-On Lab
Use a development board configured with MCUboot or an equivalent training bootloader. Build two signed firmware images with different versions. Install the first image, then stage the second image into the update slot. Capture the boot log showing image verification and slot selection.
Perform a test boot of the new image without confirming it and reset the board to observe rollback behavior. Repeat the update and allow the application to confirm itself after a successful self-test. Finally, modify one byte in a copy of the signed image and document the bootloader’s rejection. Do not perform this experiment on production equipment.
For an advanced lab, enable downgrade prevention and attempt to stage a validly signed image whose security counter is below the accepted value. Record the exact rejection reason and explain why a correct signature does not override anti-rollback policy.
Knowledge Check
- What is the difference between a checksum and a digital signature?
- Which key should remain protected by the firmware publisher: private or public?
- What is a root of trust?
- Why can a validly signed old image still be rejected?
- What problem do A/B firmware slots solve?
- Why does a test boot need an image-confirmation step?
- Does encryption by itself prove firmware authenticity?
- Why can a signature-valid image still crash after boot?
- Why should a technician capture boot logs before forcing recovery?
- What does an anti-rollback security counter protect against?
- Why can a production debugger refuse to connect even when the same tool works on a development board?
- What should happen to secure-boot protections after an authorized recovery?
Answers
- A checksum or hash detects changed data; a digital signature also proves authorization by a trusted signing key when the verification chain is secure.
- The private signing key.
- The protected starting point that anchors trust for later boot stages or firmware images.
- Anti-rollback policy may reject firmware whose protected version or security counter is below the device’s accepted security state.
- They allow a new image to be written separately from the working image, improving power-loss resilience and enabling rollback.
- So the device can revert automatically if the new application cannot prove it is healthy.
- No. Encryption provides confidentiality; authenticity requires a trusted authentication mechanism such as a digital signature or MAC under an appropriate trust design.
- The signature proves origin and integrity, not application correctness.
- Logs preserve the reason the trusted boot process rejected or reverted the image.
- Downgrading to an older signed release that may contain known vulnerabilities.
- Production lifecycle configuration may lock or authenticate SWD/JTAG and other debug access.
- The device should return to its intended trusted production state with verification protections active.
Elementary Conclusion
The simplest secure-update model is: sign with the private key, verify with a protected public trust anchor, refuse unauthorized images, refuse prohibited downgrades, and keep a known-good recovery path. A technician’s job is to verify that every stage still behaves as designed after flashing, recovery, hardware replacement, or field service.
Previous Related Lessons
- OSFTC.010: Firmware Crash Logs and Fault Recovery
- OSFTC.007: SPI NOR Flash Diagnostics
- OSFTC.005: Watchdog Timers and Reset Loops
- OSFTC.004: Firmware Flashing Interfaces
- OSFTC.003: Firmware Backup and Recovery
Primary References
- MCUboot — Secure Boot for 32-bit Microcontrollers
- MCUboot — imgtool Key and Image Management
- MCUboot — Boot Design, Revert, and Downgrade Prevention
- NIST SP 800-193 — Platform Firmware Resiliency Guidelines
- Nordic Developer Academy — Secure Boot and Secure Attestation
- Nordic Developer Academy — MCUboot and DFU Libraries
- Microchip — Secure Boot With ATECC608A
BitcoinVersus.Tech Editor’s Note:
We volunteer daily to ensure the credibility of the information on this platform is Verifiably True. If you would like to support to help further secure the integrity of our research initiatives, please donate using the QR code provided

For best QR-code scanning results, please scan this donation code from a desktop or larger screen. Mobile screens may prevent camera recognition.
BitcoinVersus.Tech provides technical education and analysis for informational purposes only.


Leave a Reply