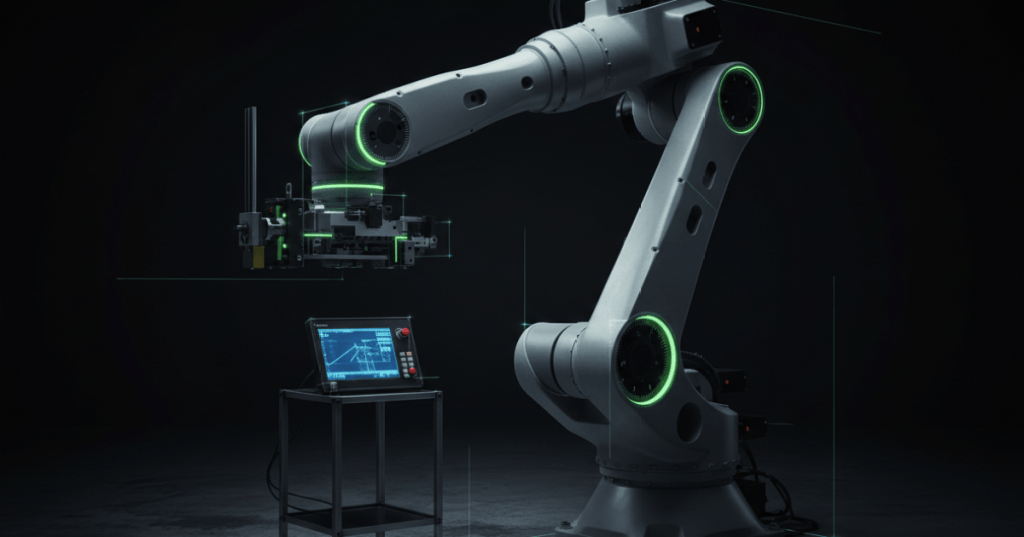
Robot mastering establishes the relationship between each physical joint position and the controller’s internal position reference. A robot can power on, jog, and even execute motion while still being incorrectly mastered; the result can be inaccurate TCP positions, shifted paths, fixture collisions, and unreliable recovery after maintenance.
OSRTC.003 continues the Open Source Robotics Technician sequence from OSRTC.001: Industrial Robot Safety — E-Stops, Safeguarding, and Safe Workcell Entry and OSRTC.002: Teach Pendant Basics — Jogging, Coordinate Frames, Speed, and Safe Manual Positioning. The manual-motion skills from OSRTC.002 are prerequisites because mastering normally requires deliberate low-speed axis positioning at known mechanical references.
Mastering, homing, calibration, and TCP setup are different tasks
Industrial robot manufacturers use different terminology, so technicians must read the manual for the exact controller and robot model. Four concepts are commonly confused:
- Mastering or zero-point calibration: establishes the mathematical relationship between encoder feedback and a known mechanical joint reference.
- Homing or reference return: moves an axis or mechanism to a defined reference position. Some systems require homing after startup; many modern industrial robots use absolute position feedback and do not perform a conventional home-return cycle every power-up.
- Controller calibration: vendor-specific procedure that applies or validates mastering data so commanded joint positions correspond to the robot’s actual mechanical geometry.
- TCP/tool calibration: defines the location and orientation of the working point on the end effector. A perfectly mastered robot can still have an incorrect TCP.
A technician should never treat these terms as interchangeable. Mastering corrects the robot’s joint reference. Tool calibration corrects the end-effector reference. User frames or work objects define task coordinates. Each layer can create a different kind of position error.
Why mastering exists
The controller must know the actual angular position of every robot joint. Position feedback normally comes from encoders or resolvers connected to the servo system. The controller stores a reference relationship between the encoder value and a known mechanical joint position.
Conceptually, the controller needs a relationship similar to:
joint angle = encoder position − mastering offset
The implementation is manufacturer-specific, but the principle is universal. If the stored relationship is wrong, the controller’s displayed joint angle no longer matches the physical mechanism.
Absolute encoders and position retention
Many industrial robots use absolute or multi-turn position feedback so the controller can retain joint position across normal shutdowns. Depending on the robot architecture, position retention may rely on an encoder backup battery, nonvolatile memory, battery-free absolute technology, or a combination of methods.
- Incremental feedback reports movement relative to a reference and normally requires a known reference procedure after position information is lost.
- Absolute feedback identifies position directly within the supported range and can preserve joint position information between power cycles.
- Multi-turn absolute feedback also tracks shaft revolutions so a controller can distinguish positions that share the same single-turn encoder angle.
Absolute feedback does not eliminate mastering. It preserves the measured position reference after mastering has already established the relationship between the encoder and the robot mechanism.
Video 1: FANUC mastering, remastering, and zero-position calibration
Common events that can require mastering verification or recovery
Mastering should be verified whenever work may have disturbed the relationship between the mechanical axis and its position feedback. Typical triggers include:
- servo motor replacement;
- encoder or pulse-coder replacement;
- loss of encoder backup power where the design depends on a battery;
- reducer, gearbox, belt, coupling, or shaft replacement;
- major axis disassembly;
- mechanical decoupling between the motor and joint;
- robot-arm replacement or controller/arm pairing changes;
- restoration from a backup when mastering data is uncertain;
- unexpected position mismatch after collision repair;
- maintenance that changes mechanical alignment.
Not every alarm means mastering is lost, and not every mechanical repair changes mastering. The correct decision should come from the manufacturer procedure, maintenance history, encoder status, and measured position evidence.
Mechanical zero and reference marks
Most articulated robots provide mechanical reference marks, witness lines, scribe marks, alignment pins, mastering fixtures, or factory-defined reference geometry for each axis. These references indicate a known joint configuration that can be used to establish or check zero position.
Reference marks are not automatically precision metrology. The permitted error depends on the manufacturer’s procedure. Some robots allow a visual zero-position mastering method for recovery; others require a dedicated mastering fixture, dial indicator, calibration jig, electronic measurement device, or factory data to achieve specified accuracy.
Zero-position mastering
Zero-position mastering places the required robot axes at their designated mechanical zero references and records the controller relationship between that physical configuration and joint zero. The general sequence is:
- Apply the approved safety and workcell-entry procedure.
- Confirm the correct robot, controller, and mechanical unit.
- Review the manufacturer mastering procedure before moving an axis.
- Jog at low speed to the specified mechanical reference position.
- Align the required witness marks or calibration fixtures using the specified method.
- Execute the manufacturer’s mastering function.
- Execute any required controller calibration or synchronization step.
- Verify joint values and reference marks after the operation.
- Perform an independent positional verification before returning the robot to production.
The sequence above is conceptual rather than vendor-specific. Menu paths, enable conditions, required fixtures, and calibration commands differ substantially among FANUC, ABB, KUKA, Yaskawa, DENSO, Kawasaki, Universal Robots, and other systems.
Single-axis mastering
When only one axis has lost its reference, many controllers support a single-axis mastering method. This can reduce disruption by preserving valid mastering data for unaffected joints.
Single-axis mastering should only be used when evidence clearly shows the other axes remain correctly referenced. Re-mastering the wrong axis, or accepting an incorrect reference position, can introduce a hidden geometric error that appears later as a path or TCP shift.
Fixture mastering and precision methods
Higher-accuracy mastering procedures use a fixture or measurement system rather than relying only on visual witness marks. The fixture creates a repeatable geometric condition that corresponds to a known joint position. Depending on the manufacturer, the fixture can include precision pins, gauges, electronic mastering tools, alignment plates, dial indicators, or laser-based measurement.
The important technician principle is repeatability. A mastering method is only useful if the physical reference can be recreated consistently enough to meet the robot’s accuracy requirement.
Video 2: DENSO VSA2/VSA4 robot calibration
Encoder backup batteries and position-data loss
Some robot encoders rely on backup batteries to preserve multi-turn position data when main controller power is removed. A weak or disconnected battery can therefore become a mastering risk.
- Follow the manufacturer’s battery-replacement procedure exactly.
- Determine whether controller power must remain on during replacement.
- Do not disconnect encoder wiring or batteries casually during maintenance.
- Record battery replacement date and any position-related alarms.
- Back up controller data before maintenance when the procedure permits.
- If position data is lost, stop and use the approved mastering recovery process rather than guessing joint offsets.
DENSO’s official VP6242 calibration guidance states that CALSET is required when a motor is replaced or when encoder backup power is lost and retained position data is no longer valid. The procedure also emphasizes maintaining the robot-specific calibration data. DENSO Robotics VP6242 CALSET guidance provides a concrete manufacturer example.
Backups are part of mastering discipline
Robot backups should preserve more than programs. Depending on the controller, service data can include mastering values, calibration records, encoder offsets, axis configuration, payload data, tool frames, user frames, I/O configuration, and system variables.
- Maintain a known-good controller backup after commissioning.
- Create a backup before major mechanical or servo work.
- Record robot serial number, controller identity, and arm/controller pairing.
- Store mastering or calibration records with the maintenance history.
- Document any axis that was independently remastered.
- After recovery, create a new verified backup rather than relying indefinitely on pre-repair data.
Mechanical alignment must be verified before software correction
Mastering cannot repair a mechanically damaged robot. If a crash, reducer failure, loose coupling, bent bracket, shifted base, damaged wrist, or tooling deformation has changed the physical geometry, writing new mastering data may only hide the underlying problem.
Before re-mastering after a significant mechanical event, inspect the relevant mechanical structure, fasteners, witness marks, backlash, bearings, reducers, coupling interfaces, brakes, and end-of-arm tooling. Position errors caused by mechanical damage must be corrected mechanically first.
Mastering does not automatically fix TCP or frame errors
A robot can be correctly mastered and still miss a process point because the tool frame, user frame, fixture location, payload, or taught point is wrong. After mastering, the technician should separate error sources:
- Joint-reference error: suspect mastering or mechanical coupling.
- Tool error: suspect TCP definition, tool geometry, or damaged end effector.
- Fixture-wide offset: suspect user/work-object frame or fixture movement.
- Only one programmed point is wrong: suspect a taught-position or program-data problem.
- Error changes with robot orientation: investigate mastering, mechanical compliance, backlash, payload, or calibration quality.
Post-mastering verification
A mastering operation is incomplete until the result is independently verified. A useful verification plan includes several levels:
- Joint display check: confirm expected joint values at the mechanical reference.
- Reference-mark check: verify that witness marks or fixtures still align after the controller accepts the mastering data.
- Known-position check: move to an established maintenance or verification pose and inspect all axes.
- TCP verification: check the tool against a known pointer, fixture, gauge, or calibration target.
- Program dry run: execute selected motion at reduced speed with adequate clearance.
- Process verification: confirm the robot reaches process-critical points correctly before restoring automatic production.
Multiple independent checks are stronger than relying on one visual zero-position alignment.
Video 3: DENSO VP6242 robot calibration
Recovery scenario: encoder data lost after maintenance
Consider a six-axis robot that reports invalid position data after maintenance on J4. The robot can still enter manual mode, but the J4 position value is no longer trustworthy.
- Stop production and document the alarm and maintenance work performed.
- Confirm whether the issue affects only J4 or multiple axes.
- Inspect the J4 motor, encoder, connector, coupling, brake, reducer interface, and wiring before changing mastering data.
- Retrieve the correct manufacturer procedure and the most recent known-good backup.
- Place J4 at the specified mechanical reference using the approved low-speed method.
- Perform the permitted single-axis or full mastering procedure.
- Execute the controller’s required calibration/synchronization step.
- Verify J4 reference position, a known robot pose, and the TCP.
- Dry-run process motion at reduced speed before production release.
- Save a new backup and document the final mastering state.
The important diagnostic rule is to investigate why position information was lost before simply writing new offsets.
Technician troubleshooting matrix
- All positions shifted after servo work: verify mastering, arm/controller configuration, and restored service data.
- One axis appears offset: verify that axis encoder status, coupling, mechanical zero, and single-axis mastering.
- TCP misses equally in every pose: verify the tool definition and tooling geometry.
- TCP error changes by pose: investigate mastering, robot geometry, backlash, mechanical damage, payload, or calibration quality.
- Position is correct until power is removed: investigate absolute-position retention, encoder battery condition, backup circuit, and related alarms.
- Robot repeats accurately but is globally offset: distinguish mastering, frame, base-position, and fixture-coordinate errors.
Safety during mastering and calibration
Mastering often places personnel near the robot while the mechanism must be positioned precisely. This makes safety discipline essential.
- Use the approved manual/teach operating mode.
- Use required enabling devices and reduced speed.
- Follow lockout/tagout when work requires exposure to hazardous energy that cannot be controlled by normal teach-mode safeguards.
- Support gravity-loaded axes or tooling when a brake, motor, reducer, or coupling is removed.
- Do not release brakes without understanding the resulting mechanical motion.
- Keep personnel clear of pinch points, counterbalance mechanisms, tooling, and external axes.
- Do not bypass safety circuits to make a mastering procedure easier.
Mastering procedures are maintenance operations, not shortcuts around safeguarding.
Exercises
- Define mastering, homing, controller calibration, and TCP calibration in separate sentences.
- Explain why an absolute encoder does not eliminate the need for mastering.
- List five maintenance events that can require mastering verification.
- Explain why the lightly visible alignment of witness marks may not provide full factory accuracy on every robot model.
- Develop a verification sequence for a robot after J3 motor replacement.
- Describe how to distinguish a mastering error from a TCP error using multiple robot poses.
- Explain why a crash-related position error should trigger mechanical inspection before remastering.
- Create a backup checklist that preserves programs, frames, service data, and mastering records.
- Describe a safe approach to single-axis mastering after encoder-data loss.
- Explain why a reduced-speed dry run is required before production release.
Knowledge check and answers
1. What does robot mastering establish?
It establishes the relationship between the robot’s physical joint reference positions and the controller’s encoder-based joint position values.
2. Is mastering the same as TCP calibration?
No. Mastering establishes joint references; TCP calibration defines the working point and orientation of the end effector.
3. Why are mechanical zero marks useful?
They provide a reproducible physical reference that can be used to check or establish a known joint position.
4. When might encoder-battery failure affect mastering?
When the robot depends on that battery to retain absolute multi-turn encoder position data while main power is removed.
5. Why can single-axis mastering be preferable after one-axis repair?
It can preserve valid mastering data for unaffected axes while correcting only the axis whose reference was lost.
6. Why is a post-mastering TCP check important?
Because a numerically accepted mastering operation can still be physically inaccurate, and a TCP check provides an independent geometric verification.
7. Can mastering correct a bent wrist or damaged reducer?
No. Mechanical damage must be corrected mechanically; remastering should not be used to hide physical misalignment.
8. What should be done after successful mastering recovery?
Verify joint references and TCP accuracy, dry-run critical motion at reduced speed, document the repair, and create a new known-good controller backup.
Key takeaway
Robot mastering is the foundation that makes encoder feedback correspond to actual mechanical joint position. Reliable recovery requires more than pressing a calibration menu: technicians must understand the difference between mastering, homing, TCP calibration, and frames; protect encoder position data; inspect mechanical integrity; use the correct model-specific reference method; independently verify the result; and preserve a known-good backup after service.
Safety note: mastering and calibration procedures are manufacturer- and model-specific maintenance activities. The exact service manual, required tooling, approved safety procedure, and qualified-person requirements take precedence over generalized training material.
Display note: this lesson intentionally uses standard Gutenberg paragraphs, headings, lists, and responsive media embeds rather than decorative text boxes, helping prevent clipped or overflowing lesson text on mobile displays.
BitcoinVersus.Tech
Advertisement
Editor’s Note:
We volunteer daily to ensure the credibility of the information on this platform is Verifiably True. If you would like to support our research initiatives, please donate here: 3C9o19EH5HSiwEPyCTmEKzxhNCbo2X6TTb
BitcoinVersus.tech is not a financial advisor. This media platform reports on financial subjects purely for informational purposes.


Leave a Reply